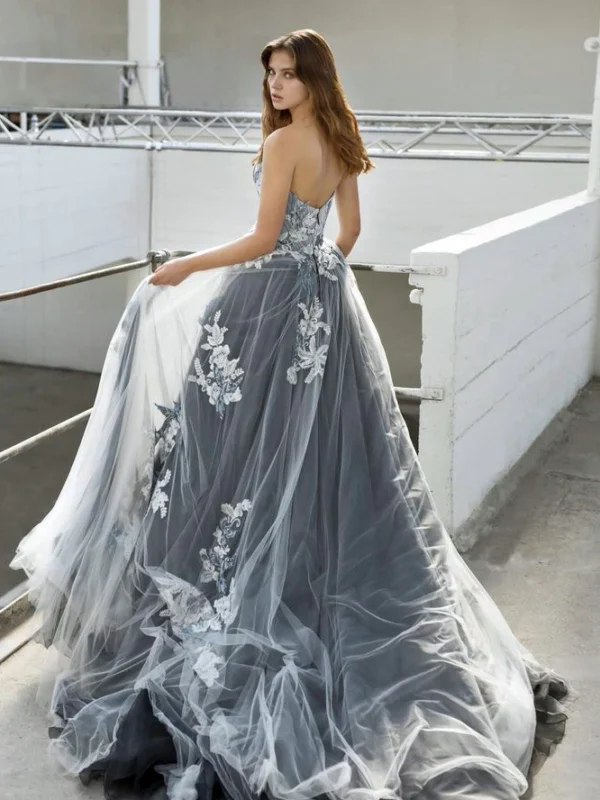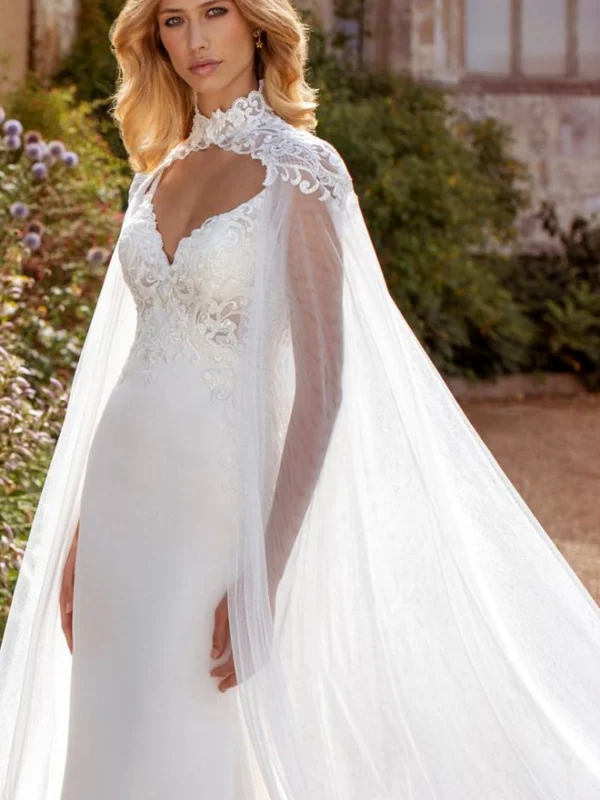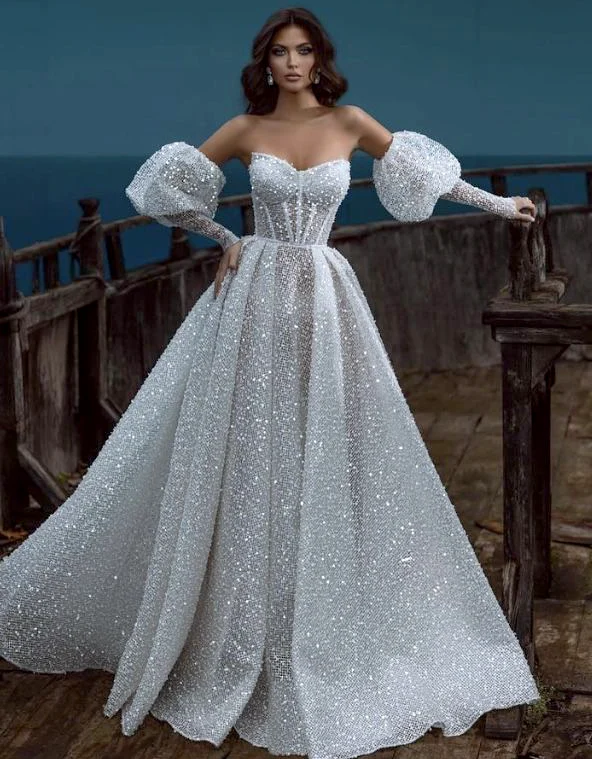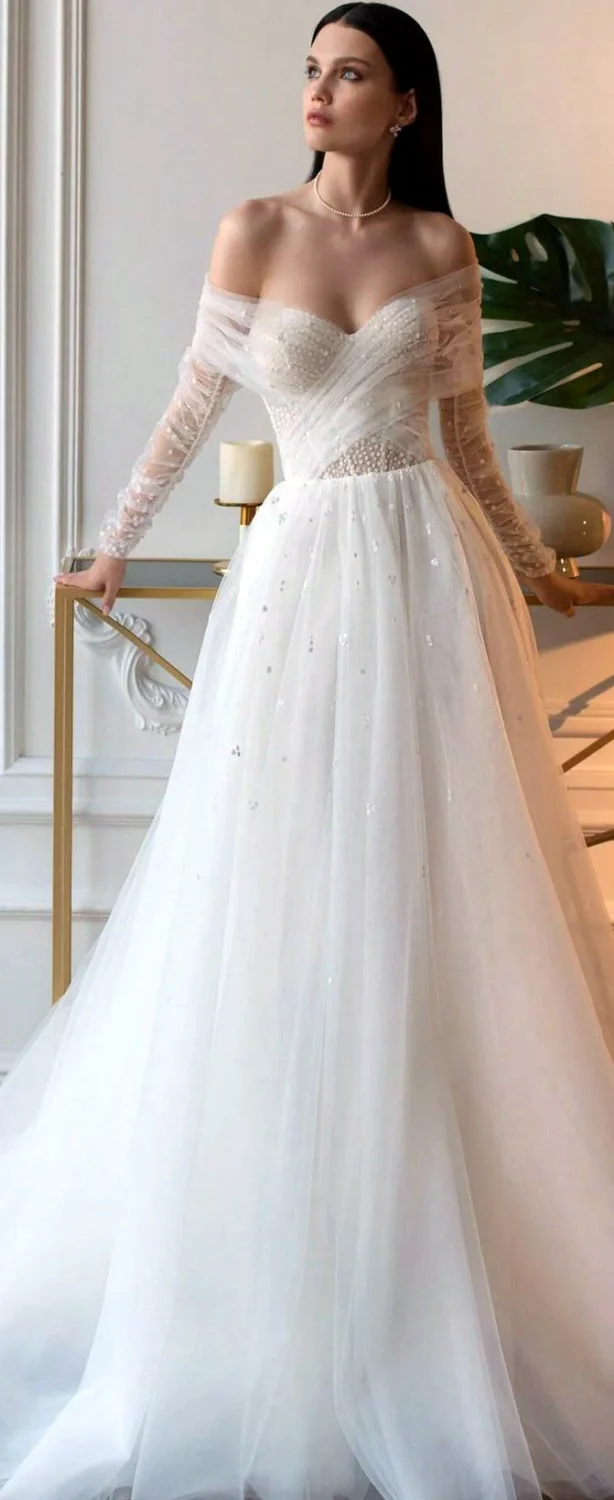
A wrap-look wedding dress can gain interest from crossed fabric bands across the bodice without being a dress that genuinely wraps to close. In the view with long patterned sleeves, soft diagonal bands travel over the chest and middle, leaving a decorated structure visible beneath them. That effect deserves its own selection: which direction appeals to you, how broad should the bands appear and where should they end? The three further views offer different neckline arrangements for comparison rather than four examples of an identical wrap construction.
Read the crossing on a wrap-look wedding dress first
Trace only the two visible diagonals to begin with. One edge travels from the upper side towards the opposite middle while another runs over or against it. The interesting point is how those directions create a new division in front of the bodice. Describe these lines before deciding on the whole skirt. If the crossing itself appeals to you, a straight photograph from shoulder to waist is more useful than several changing full-length poses with the skirt held differently in each.
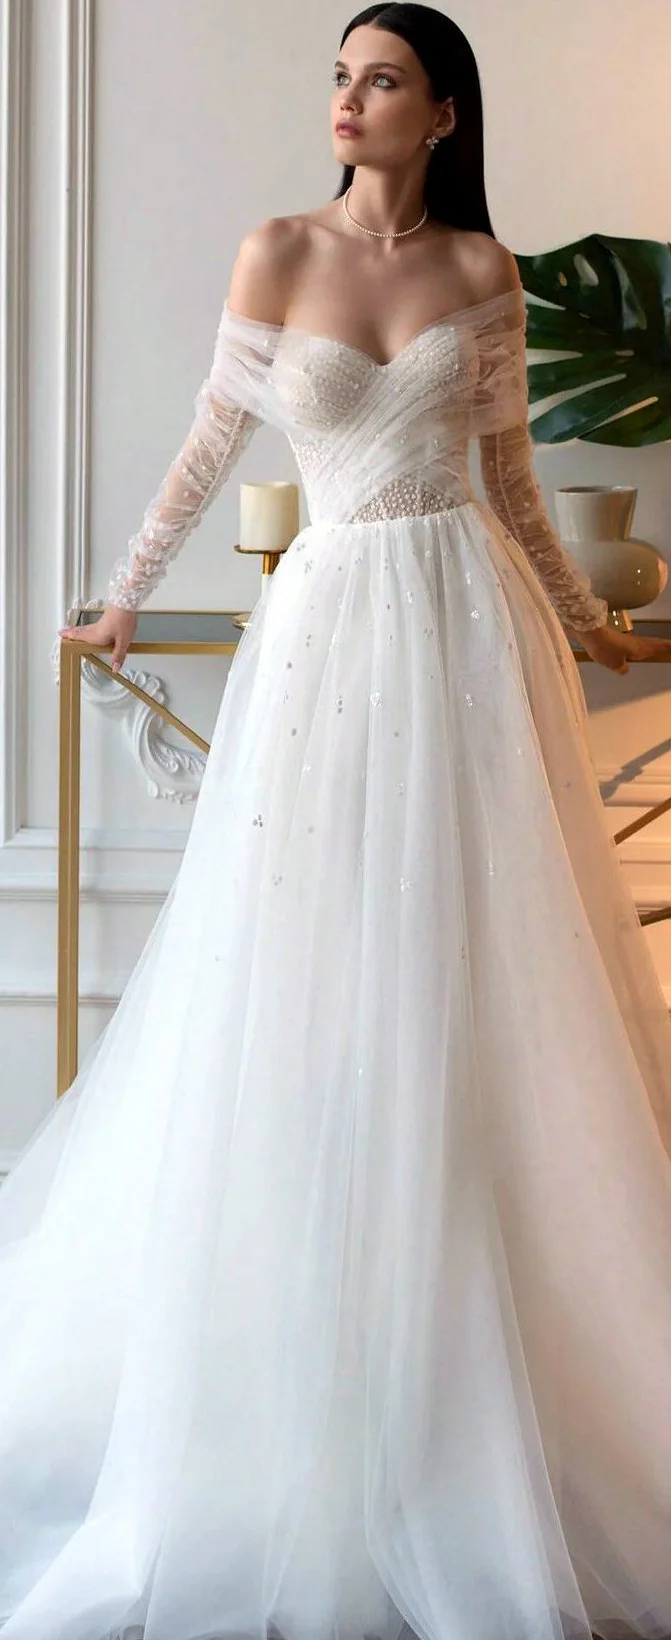
Ask for an unchanged front view without turning sideways at the fitting. Then demonstrate whether you prefer a broad soft crossing or a narrower, more definite line. A folded band edge and a smooth diagonal can create different effects even when travelling in the same direction. These visible differences let you explain the result you want precisely. Whether a band is fixed in place, overlaps or is supported in another way remains a separate question about the actual construction rather than an answer supplied by the photograph.
Choose the spaces between the bands and underlying pattern together
The crossed bands do not cover the decorated bodice completely. Patterned areas remain visible between and beside them. You are choosing the relationship between quieter surface and pattern beneath it as well as the band shape itself. Broader plain bands might suit a deliberate focus on the crossing. If you want more of the pattern visible, the size of the spaces between the bands becomes a useful comparison. None of this requires identifying a particular fibre from the pictured surface.
Photograph two arrangements under the same lighting and from the same distance. Observe whether a glossy-looking band edge becomes more prominent in the photograph than in the mirror. Include a real fabric sample when ordering. An attractive image does not automatically explain the surface in daylight or during movement. Our simple wedding dress guide adds the choice between quiet zones and decoration, while the precise crossing remains the main decision here. Keep the band arrangement visible as a distinct choice within the wider dress.
Treat the waist finish as its own decision
The direction changes again where the diagonals approach the waist. A definite finish can close the crossing visually, while a softer transition can carry it into the skirt. Look beyond the narrowest point. Decide whether you want an edge, fold or decorated interval visible there as well. Record the specific location you like in the photograph so a consultation does not automatically copy every neighbouring line. The upper direction and the way it finishes at the waist are related but separate preferences.
Sit in the real dress on a suitable chair and stand again. Compare the positions of the visible band edges before and afterwards. The aim is to understand the arrangement while worn, rather than prevent every natural fold. If you want to readjust something, have the intended area demonstrated. Do not pull an unfamiliar decorative band on the assumption that it controls fit. The visible wrap effect does not establish which component positions the dress, or how that component should be handled after sitting down.
Assess long sleeves and open shoulders together
The crossed example combines an open upper shoulder line with long patterned sleeves. This divides skin, pattern and band surface differently from a fully covered neckline. Assess the upper edge with arms relaxed, then in a simple action such as holding a glass. The hands resting on a surface in the photograph demonstrate one pose. They do not establish that every arm movement retains an identical band position. A real fitting can answer that practical question with the actual model and your planned movements.
Also choose which line you want directly beneath the face. The diagonals can already form a strong frame while the patterned sleeves add substantial pattern at either side. Our off-shoulder dress guide helps consider upper edge and arm use together. For a wrap-look wedding dress, the additional question is whether you still like the crossing when your arms leave the ideal pictured pose. Choose neck jewellery after this decision rather than using it to resolve an upper arrangement you have not yet compared.
Use three other necklines as genuine counter-comparisons
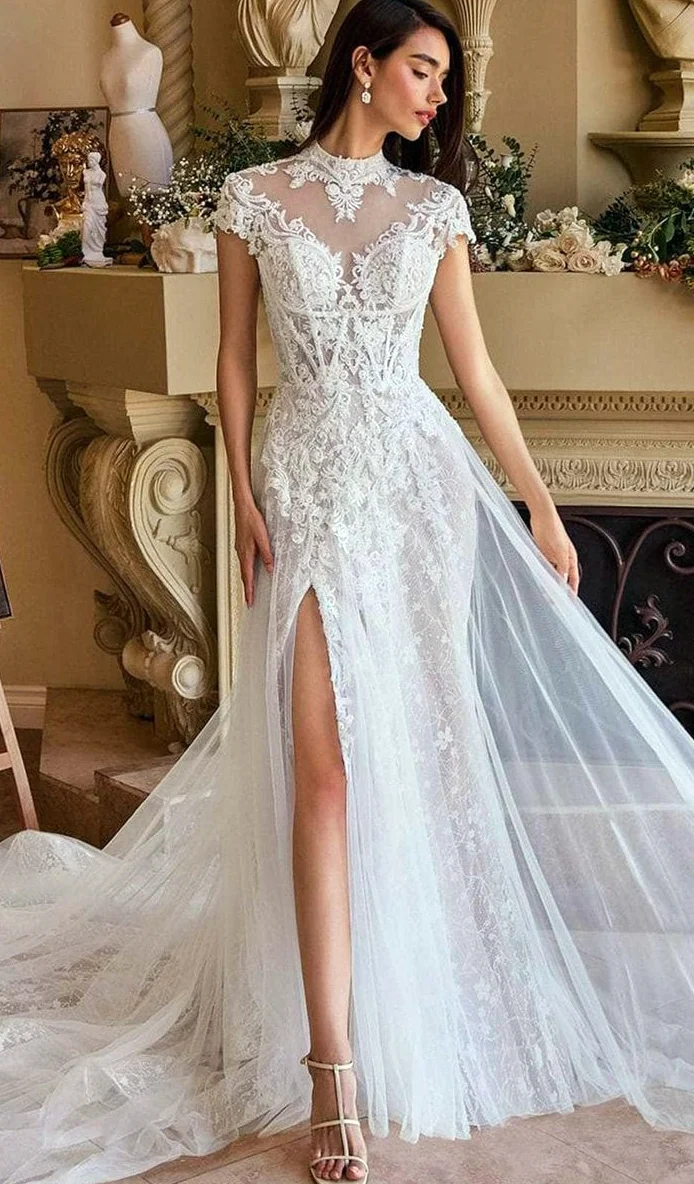
The high translucent-looking neckline panel with patterned borders supplies a different frame. A more shaped inner chest area is visible beneath it; farther down, a fitted front skirt section, opening and broad outer skirt section held to one side add other decisions. Separate them when comparing. You may like the upper frame while finding the lower opening irrelevant to your selection. One photograph does not need to become a complete package when the purpose of the comparison is to understand the arrangement of the bodice.
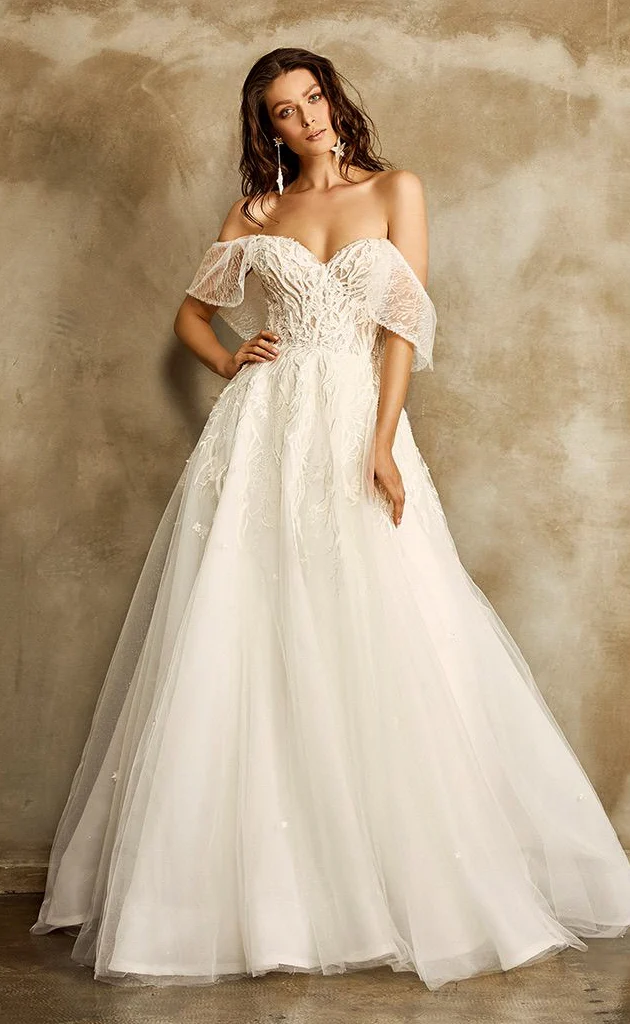
The two remaining views distribute lines differently again: softly folded off-shoulder upper-arm areas in one, fine straps and a deep V in the other. Both leave more of a continuous patterned front visible than the broad crossed bands do. Ask whether you prefer a divided middle or a more uninterrupted front area. That difference makes the counter-comparisons useful. They do not need a wrap effect themselves to help establish what you actually want from the crossing, and describing them distinctly keeps the comparison grounded in the pictured garments.
Test two bodices with the same lower-dress idea
Reduce the next round to the crossed arrangement and one clearly different upper solution. Describe the same desired skirt volume and lower length for both initially, even though the comparison photographs show different skirts. The bodice choice then becomes easier to recognise. If a different lower section is added later, assess the relationship again. A particular diagonal can look different beside another waist or a quieter skirt without the band shape itself changing. Treat that as a reason to check the whole garment again before committing.
Record three specific things for each candidate: direction, visible pattern and waist finish. Add one unresolved point for the fitting. This makes a wrap-look wedding dress easier to search for or discuss without beginning again at every new photograph. Keep the alternative as a complete candidate too. Preferring its quieter middle in the end is a useful result of comparison. It gives you a clear reason for the final choice and a specific feature to request rather than an obligation to keep the original crossing idea.
Establish construction, alterations and care on the actual dress
Before ordering, clarify what the visible wrap effect means technically. Ask about entry, fastening and any adjustment, and request a demonstration on the offered model. This matters particularly if you want another band width or upper-edge height. An alteration may affect the construction and cannot be promised from a front photograph alone. Record the visual request separately from the confirmed work. Both parties should understand whether appearance alone, or a particular way of operating the garment, forms part of the agreement.
Care information also belongs to the real dress and its individual surfaces. GINETEX describes the five care-symbol groups: washing, bleaching, drying, ironing and professional textile care. White bands or floral pattern do not establish a treatment on their own. Ask specifically about the folded areas and decoration. By the end, you should understand the visible direction you want alongside the actual fastening, agreed alterations and care, so the bodice is a clearly described garment choice rather than an attractive picture with unresolved practical assumptions.
A wrap-look wedding dress is considered here through crossed upper bands. The visible effect does not establish a functional wrap fastening.
Frequently asked questions
Is a wrap-look wedding dress automatically adjustable?
No. Crossed bands can form a fixed decorative construction. Whether and how the dress adjusts must be demonstrated through its actual fastening.
Which other necklines should I compare with the crossed bands?
Compare a high patterned neckline, a soft off-shoulder edge and fine straps with a deep V. These alternatives help you choose a divided middle or a more continuous patterned front.
Do I need a necklace with the wrap effect?
No. Assess the visible band edges and underlying pattern first. Then decide whether another accent contributes to the middle you want.
What should an alteration request specify?
Name the desired band width, upper-edge direction or visible waist finish separately. Establish which alteration is technically possible on the actual model before ordering it.