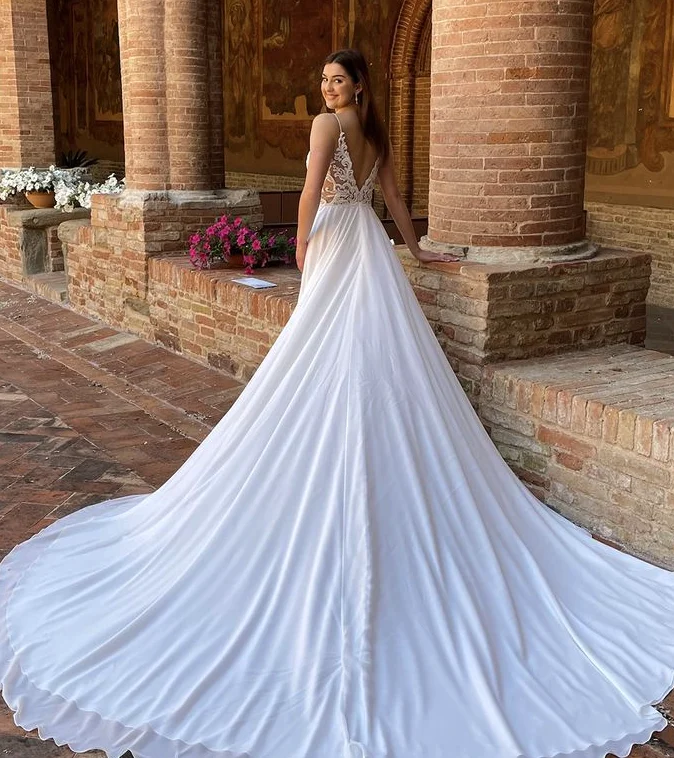
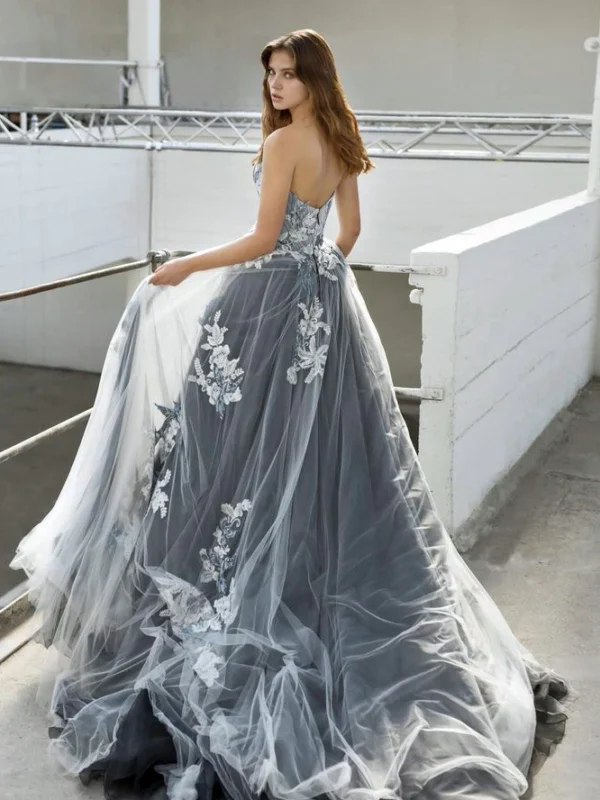
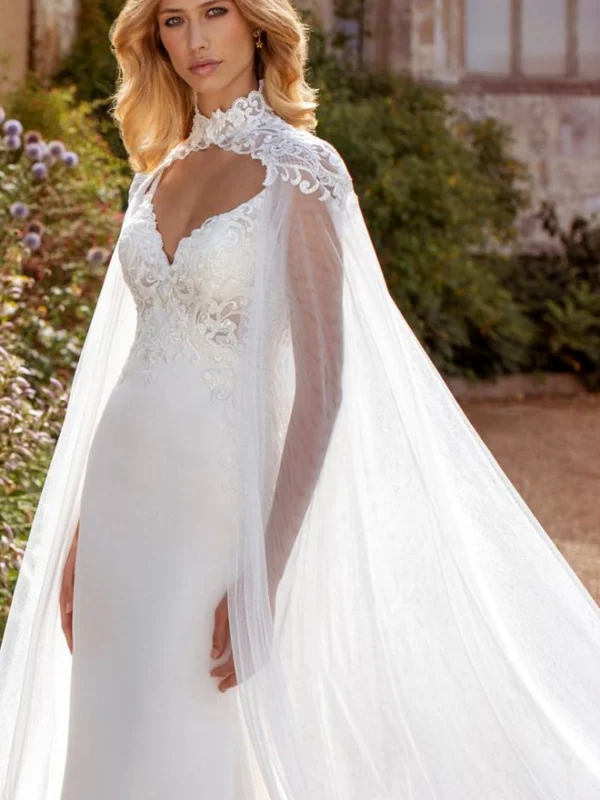
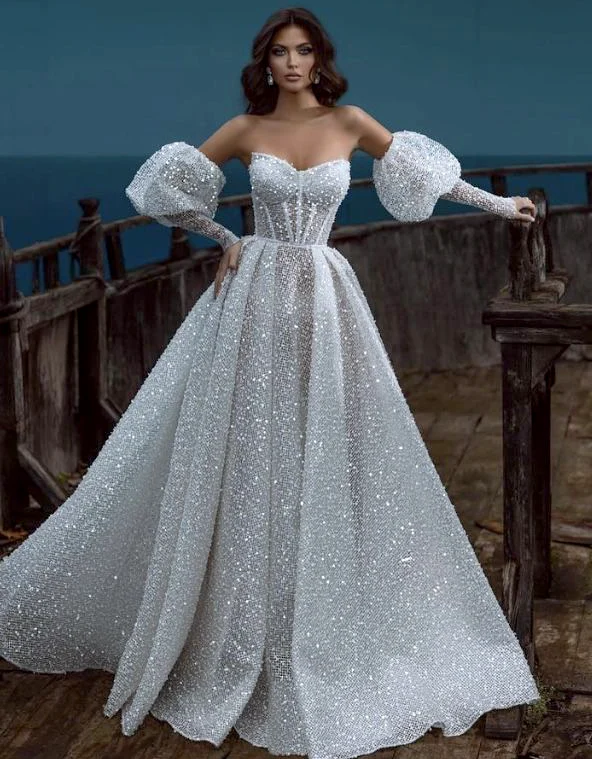
A wedding dress train should be chosen through more than its prettiest spread-out photograph. Consider how much skirt continues behind you, how broad that area is and how you want to handle it during your planned day. Four references show different arrangements: a quieter skirt with a floral edge, a densely patterned close-fitting dress, a wider skirt and longer shoulder panels over a narrower model. Choose the rear outline you want first. Then test shoes, movement and the available handling options on your own dress.
If you plan a veil, assess its lower edge together with the train. An additional patterned border can lie over the skirt and change the visible outline. The wedding veil styling guide helps compare that second long layer. View the pieces together from behind and decide which motifs you want to remain separately recognisable.
1. Where does the wedding dress train begin?
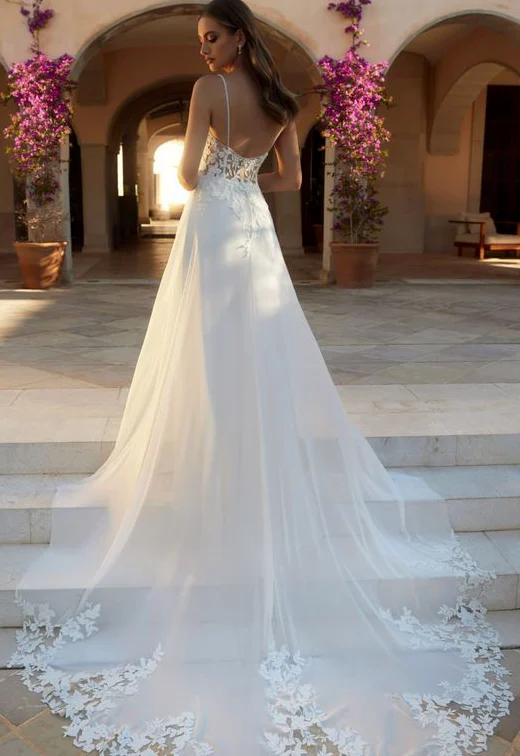
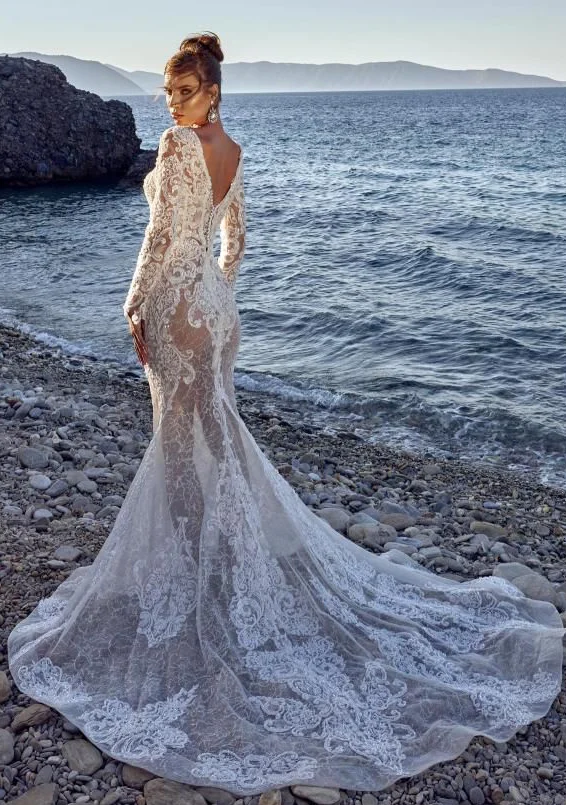
Follow the skirt from the back to its farthest finishing edge. In the steps photograph, a largely quiet skirt continues into a translucent-looking area with a floral border. On the closer-fitting dress beside the water, pattern instead covers almost the entire visible rear area. These represent different preferences: a more clearly defined decorative edge or a continuous patterned surface. Choose where you want the detail before deciding purely that you want more length behind the garment.
The garden view adds long panels descending from the shoulders. Assess these upper panels separately from a train continuing from the skirt. Have each layer’s starting point and connection to the dress shown on your candidate. Ask which pieces are included in the available model as well. A rear photograph does not fully explain those connections or establish a detachable construction. Comparing their upper starting points and lower edges together helps you describe whether you want a shoulder detail, a longer skirt or both.
2. How much length and width do you want?
A long narrow train and a broadly arranged area occupy different amounts of space in the complete view. At the fitting, ask for the skirt to fall naturally first. Look from behind and from the side without having it rearranged for every photograph. Compare that with a deliberately spread view afterwards. You can then see which shape develops while standing and which needs arranging for the photograph you want, rather than expecting the wide display to remain unchanged during every movement.
Note the actual measurements of the available dress or have them shown. Do not estimate length from another person’s height. When comparing two candidates, wear the intended shoes with both and use a similar viewing distance. Before shortening anything, ask which part of a patterned border would be affected and what the new finish could look like. A shorter preferred length does not by itself describe the edge you want; discuss those two choices together on the real garment.
3. Which skirt shape should lead into the train?
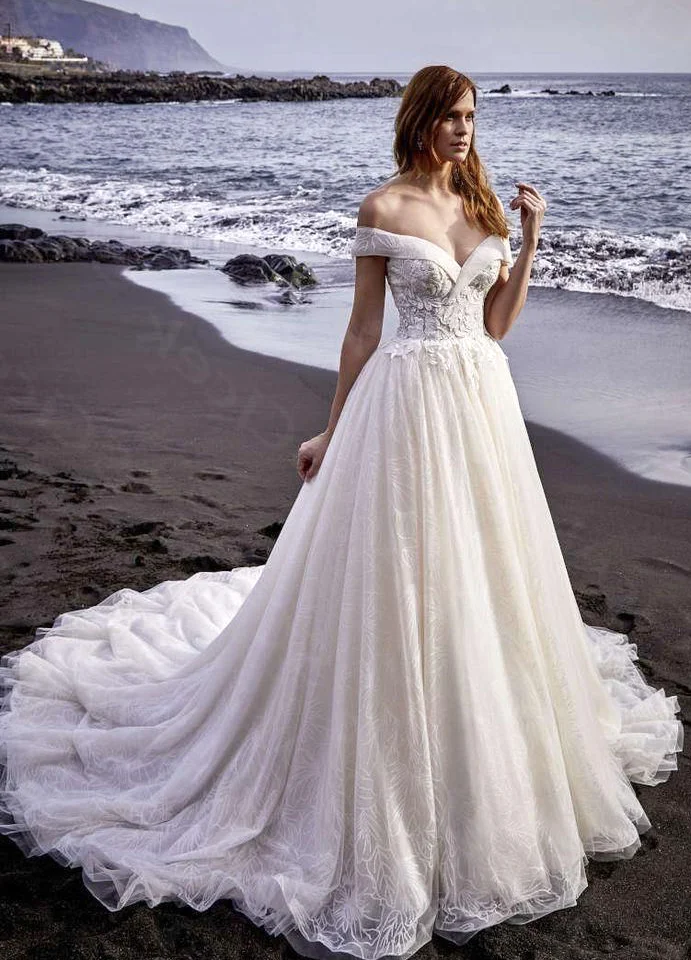
The front and side skirt shapes remain separate decisions. The front beach photograph has a visibly wider skirt below a decorated bodice. The long-sleeved rear comparison fits closer around the hips and upper legs before opening below. You can like a similar length behind while preferring a different amount of width in front. Assess both views of the same real dress rather than quietly combining the front and rear of different photographs into a garment that is not available.
If volume particularly appeals, the full-skirt wedding dress guide expands that choice. The lace wedding dress guide helps compare more strongly defined motifs and edges. Here, concentrate on how your chosen skirt shape continues into the trailing area. Pattern does not have to be equally dense in every section for you to like the complete silhouette. Compare a quieter front and decorated edge against a more continuous motif arrangement on the actual models.
4. How does the hem work with your shoes?
Bring the shoes you actually intend to wear to the decisive length fitting. Look at the front floor line first and then take several ordinary steps. Do not hold the skirt up throughout the whole trial if you also want to wear it without that movement later. Have the intended handling explained and try it yourself. A train does not remove the need to assess the front length on the dress you are wearing, with the real footwear below it.
If you plan a second shoe for a later part of the day, try it with the same dress too. Note whether it changes your preferred front finish. The references do not supply a general heel height, and several show footwear only partly or not at all. Your decision therefore needs the real combination rather than an estimated length allowance inferred from a photograph. Keep the front hem and trailing back visible in separate views so each can be evaluated clearly.
5. Does the train work for your routes and sitting?
Consider the intended sequence: arriving, possible steps, your seat, standing up and moving between places. Ask the relevant people about the real routes and available space. The steps, shore and garden photographs are styling references, not proof that every similar-looking dress suits your own location. At the fitting, walk with the intended bag, turn, sit and stand again. These particular movements let you discuss the actual garment rather than choosing through the scenery around someone else’s dress.
Check which hand remains free. If someone will help arrange the train, plan that assistance specifically. A spread-out area for a photograph and a skirt used for frequent changes of position do not have to sit identically all the time. Choose the moments when the larger rear outline matters most to you and the handling you genuinely want for the rest. Try the real arrangement with intended flowers as well if carrying them forms part of your plan.
6. Can the train be bustled?
Discuss this before deciding with the person responsible for alterations. The Maggie Sottero bustle guide describes a gown-specific solution and having its use demonstrated at the fitting. That does not establish an existing attachment on these references. Ask whether an appropriate option is available for your actual model and how the skirt looks afterwards. The answer should concern that particular garment, rather than a promise transferred from another dress with a similar rear outline.
Where offered, try both arrangements with your shoes: trailing and lifted. Can you sit and walk with the changed skirt shape, and do you like the new rear view? Whoever will help later can learn the specific sequence at the final fitting. Ask separately whether any additional panel offered with the dress is detachable. Bustling, removing and shortening are different decisions and should be described clearly in the information for your chosen garment rather than treated as interchangeable ways of saying the same thing.
7. Which details should be established before buying?
Confirm which dress, layers and alterations are included. Request a specific explanation before agreeing to a planned edge change. Establish composition and care for the actual product; pale or translucent-looking areas in a photograph do not determine a cleaning method. GINETEX explains care symbols, while your dress’s own label remains decisive. Keep those instructions with the product information rather than inferring them from the visible decorative border or a general description of bridal fabrics.
Your wedding dress train is deliberately chosen when you have assessed three views and two situations: front, side and rear, plus standing quietly and ordinary movement. Add your intended shoes, bag and any confirmed bustle option. The train can then remain a wanted part of the outfit whose shape and handling you have experienced on your own dress before the planned day. Choose that complete arrangement instead of deciding length first and leaving the real front hem, movement and alteration questions until later.
Choose a wedding dress train by length, width and pattern distribution first. Then assess the real front hem with your shoes, routes and sitting, plus any alterations offered for the actual gown.
Frequently asked questions
How do I compare a wide and narrow train?
Let both rest naturally before deliberately spreading them. Use the same shoes and a similar viewing distance to distinguish ordinary placement from a photograph arrangement.
Should I try a second shoe at the length fitting?
If you intend to change shoes later, try the other pair with the same dress too. Check the front floor line and ordinary steps particularly.
Does every train come ready to bustle?
Do not assume so. Ask about existing attachments on the actual dress and discuss any alteration with the person responsible. Have its operation demonstrated.
Thoughts on this article