A retro bridal look can develop through pronounced shoulders, a prominent headpiece and repeated skirt edges. You do not need to reproduce an entire photographed outfit. These references show short ruffled sleeves, raised shoulder shapes, long sleeves and two closer head views. Decide whether the face, shoulders or skirt should receive the first attention. Choose one starting point and develop the other areas around it. The pictures provide design ideas rather than evidence of a garment’s age or a particular historical period. Your own arrangement can borrow a shape without making a claim about its origin.
Begin a retro bridal look with one emphasis
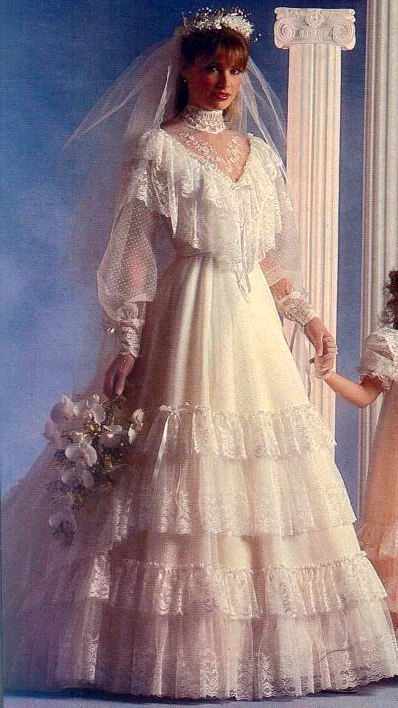
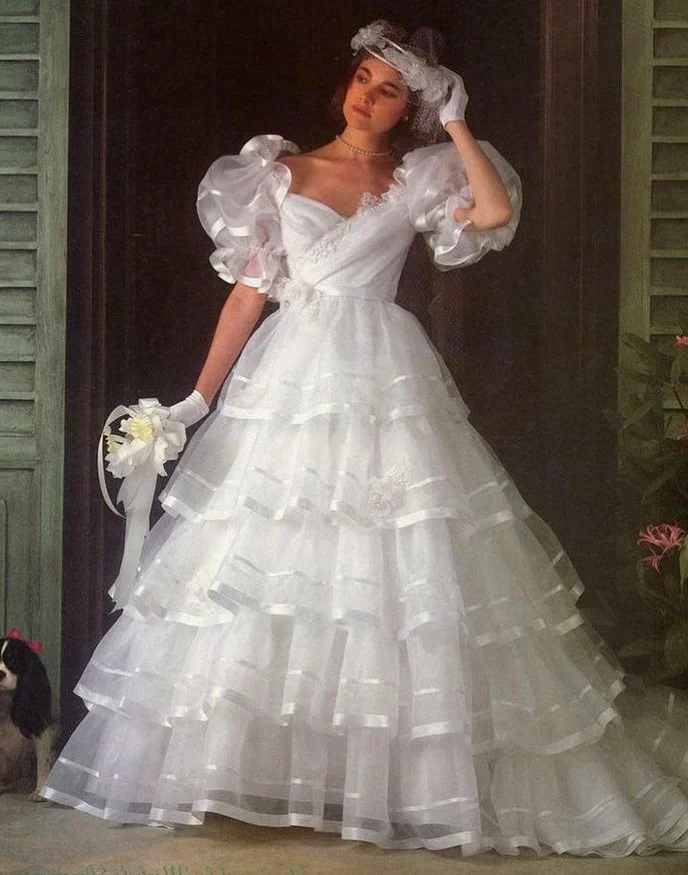
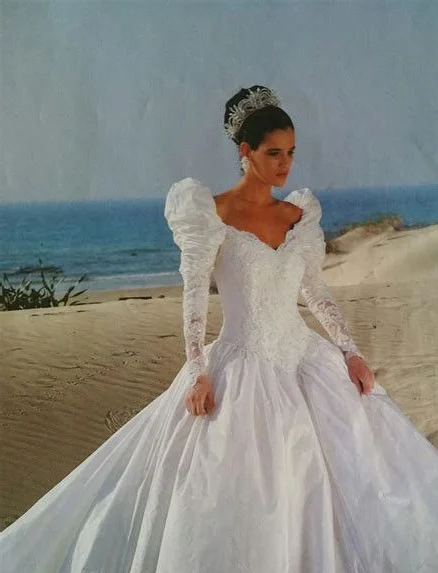
Record three preferences separately: how wide the shoulder outline should appear, how much space the headpiece should occupy and how clearly you want skirt tiers visible. The short ruffled-sleeve dress repeats brighter edges almost to the floor. The reference with long narrower forearms concentrates more volume around the shoulder points. These are different distributions even if both appeal. Choose which relationship to try yourself rather than recording only a broad impression such as romantic or nostalgic. The location of the detail gives a fitting comparison something specific to answer.
Prepare a quieter comparison next. If a large headpiece is the priority, begin with the intended dress and no additional necklace. If sleeves should lead, start with a smaller hair arrangement. This sequence does not prohibit several large details together. It simply makes each contribution visible before you decide. With permission, photograph both arrangements from a similar distance. You can then explain why one combination appeals instead of treating an entire photograph as an unchangeable model. A deliberate full arrangement is different from accumulating every attractive detail at once.
Distinguish short ruffles from raised shoulder shapes
The short ruffled sleeves create several open curves beside the upper body. Other dresses carry higher shoulder shapes into longer sleeves. Compare the outer direction first. Would you prefer sideways volume, a more definite shoulder point or a longer route towards the hand? A raised arm changes the view. Begin on the actual dress with arms resting naturally before holding a bouquet or copying a photographic pose. The silhouette should appeal in the position you ordinarily use as well as in a deliberately arranged image.
Inspect the side and its connection to the bodice afterwards. A pointed lower front motif and a crossed-looking upper area produce different continuations beneath a similar broad shoulder idea. Seek an actual offered version if you want to change that relationship. Leave the veil aside briefly too, making the sleeve width easier to assess. Try greeting someone and reaching for a glass. If an edge needs rearranging after each action, identify the particular place. That supplies a more useful alteration question than a general request for the entire outfit to feel different.
Treat headpiece and veil as two separate forms
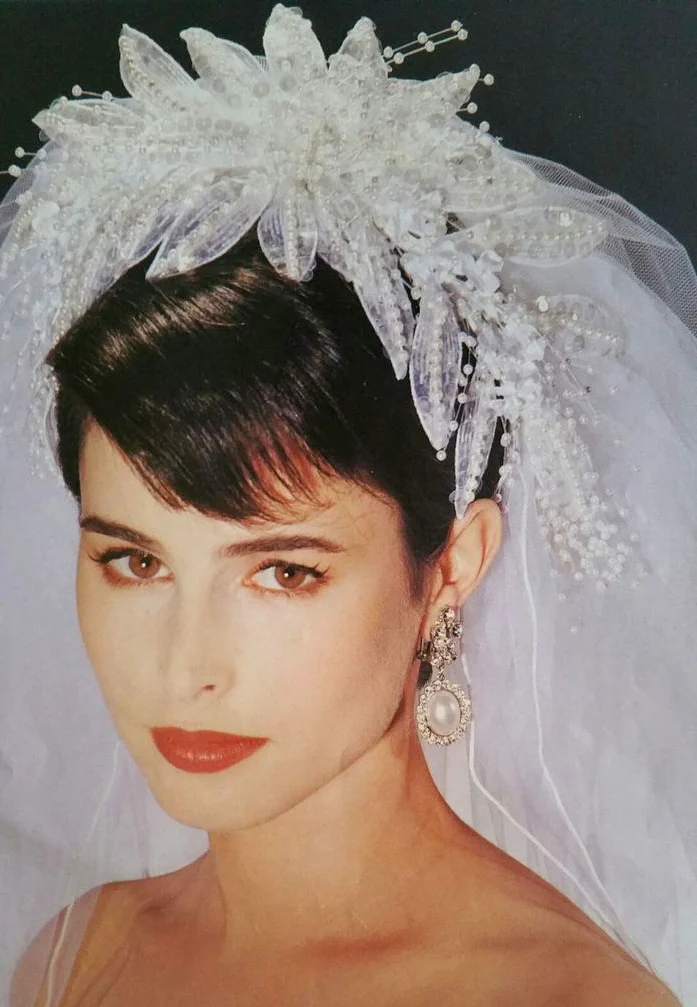
One close head view places pointed leaf-like forms in a clear upper arc beside long oval earrings. The second adds large upright transparent-looking folds behind the head. Both are prominent, but their volume comes from different places. Choose the shape directly against the hairline first. Add the actual veil afterwards and look sideways. A large impression may come from the headpiece, the veil or both together. These close photographs should not be mentally assigned to one of the full-length dresses as if they were matching views.
Test the intended hairstyle with the specific pieces you will wear. Move hair away from the neck once, then return it to the planned position. Notice which shapes remain visible beside face and shoulders. Hold your head normally, turn and sit before assessing the connection. Attachment and potential alterations belong to the particular product. The Bridal accessories guide helps introduce other jewellery positions individually. You may enjoy an elaborate head frame while leaving the neck quiet. An uncovered area does not automatically require another object, especially while you are still deciding which detail should lead.
Connect skirt tiers to the bodice details
On the short ruffled-sleeve dress, brighter horizontal edges repeat across the broad skirt. The complete view with the higher collar also uses several lower bands. Another long-sleeved reference keeps a larger quieter skirt area between the bodice decoration and patterned lower border. Decide whether you want repetition along the entire length or a pause between upper and lower detail. Either can belong to your chosen retro idea. A style label does not prescribe the same level of decoration in every part of the outfit.
Compare the complete length with intended shoes. Let the skirt fall normally instead of spreading its sides every time. A hand-held fabric area shows a different width from a freely hanging skirt. The Full-skirt wedding dress guide develops the lower-volume decision. Here the additional question is whether tiers, sleeve ruffles and veil folds should repeat a related shape. You can adopt just one and keep other areas simpler. That preserves the original preference without forcing every section of the dress and accessories to become equally busy.
Introduce jewellery and gloves deliberately
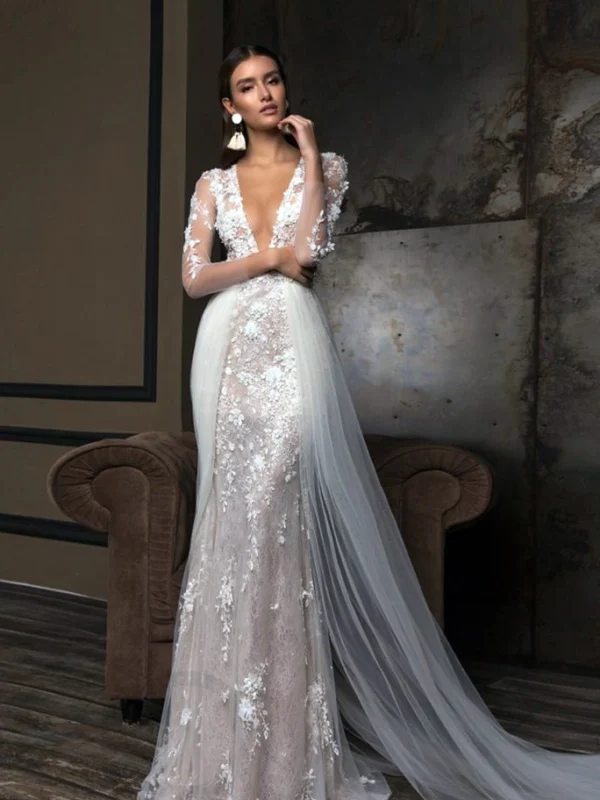
The references include short gloves, a close neck accent and longer drop-shaped earrings. Do not turn those observations into a compulsory list. Assess earrings against the headpiece first. A large side ornament may prompt another earring choice from a narrower hairband. Introduce neck decoration afterwards. A high sheer-looking neckline with a motif border presents a different question from a clearer open neck area. Inspect the real spacing and complete front rather than relying only on separate product pictures placed together. Your actual arrangement can remain quieter than any of the examples.
If gloves appeal, try them with the bouquet and the real sleeve ends. Short ruffles leave the forearms clear, while long sleeves already create a drawn boundary near the hands. Decide whether to continue that boundary or keep a quieter transition. Remove jewellery one piece at a time if the distribution becomes hard to read. A deliberately abundant look is as possible as a single strong accent. What matters is selecting the combination yourself rather than adding everything visible across several unrelated photographs without considering their combined effect.
Confirm all three areas in the complete outfit
Bring shoulders, head and skirt together at the end. Inspect the front, then the side and back of your actual dress. A veil may overlap part of the sleeve outline, while another hair position may change the apparent width around the head. Walk a few steps and hold a bouquet at a comfortable height. Assess the seated view too. Record one feature that must stay and another about which you remain flexible. Those notes give a later fitting a clearer direction than a broad request for more retro detail.
Ask about composition, attachment and suitable treatment for each actual piece. GINETEX explains care symbols. Visible flowers, pale points and transparent areas cannot establish material or manufacturing method. Begin the styling decision with observable shapes, then choose the arrangement in which your main emphasis remains clear without a special pose. This creates your own retro bridal look through understandable choices. It does not require presenting an unverified historical example as authentic or adding the greatest possible number of nostalgic-looking objects.
Choose whether shoulders, headpiece or skirt should lead. Add the other elements separately and compare the whole outfit without assigning a historical date to the references.
Frequently asked questions
Does a retro look require an old wedding dress?
No. Retro describes a chosen styling idea here. The age, origin and originality of a particular garment need separate evidence beyond a photograph.
Can large sleeves and a prominent veil work together?
You can deliberately choose both. Compare the shoulders without the veil first, then add the actual headpiece and veil to assess their combined width.
Does a tiered skirt need a necklace?
Not automatically. Repeated skirt edges already create a motif. Assess the neck and head without extra jewellery before adding the accent you want.