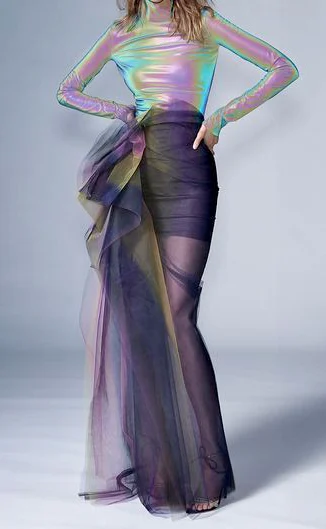
A holographic-look outfit can be used at very different levels of emphasis for an evening occasion. A broad reflective upper area differs from many small coloured flashes or a narrow blue-green detail. These four views are therefore not interchangeable versions: they show a long outfit with a dark sheer-looking skirt area, a pale diagonally folded bodice, a short trouser look with dense reflections and a blue-green waist crop. Start by deciding how much surface you want to highlight. Choose length, neckline and supporting additions afterwards, keeping the complete arrangement in view.
1. Compare a holographic-look outfit through colour scale
Broad pale colour zones move between green, pink and violet across the upper area of the long look. The darker lower section creates a clear division. In the short trouser reference, many small differently coloured reflections sit closely together instead. Compare both arrangements from normal conversational distance. Do you want larger connected colour fields or a finely active overall surface? That is a more precise fitting request than asking for as much shine as possible. An emphatic surface and a comparatively restrained distribution can still be part of the same preference.
For the next step, find two actual candidates with a reasonably similar length or basic shape. Change the scale of colour play first. Look at the whole silhouette before moving closer to the surface, and record what appeals at both distances. A small pattern can be especially interesting close up, while a broader colour zone remains clearer across the complete outfit. The decision concerns your preferred effect rather than ranking supposedly more elaborate and simpler technologies that the photograph does not explain. Keep the request tied to what you can see.
2. Place one focal area beside a quieter surface
The first picture combines a pale reflective upper section with a much darker skirt area. A side arrangement of fabric carries folds and colours farther down while keeping the top recognisable as its own emphasis. If you enjoy that amount, try a noticeable top with a quieter lower piece you already own. Compare them without another large jewellery area first. This reveals whether the contrast is sufficient or whether you want to repeat colour somewhere else. Your actual combination can use different cuts from the reference while retaining the relationship you liked.
A holographic-look outfit does not need many further accents even when the reflective surface occupies a large area. The short trouser look shows how much colour can already appear on the garment itself. Compare a plain bag with a reflective one held in the same position. Decide deliberately whether you want another active area. Keep shoes, jewellery and hair unchanged while doing this. One controlled comparison reveals whether the addition supports the existing surface or moves the intended focus of the outfit elsewhere, rather than letting several simultaneous changes obscure the result.
3. Choose a long silhouette and short trouser arrangement separately
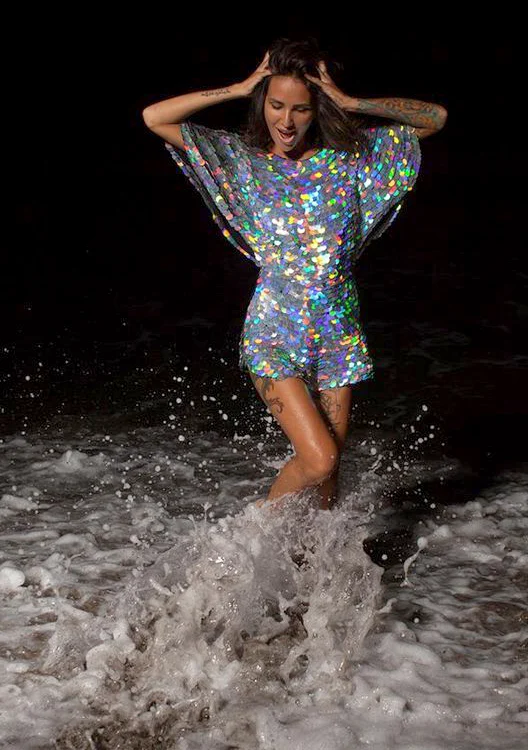
The first long outfit and the short trouser look create different clothing tasks. The shorter reference has two short leg openings and broad short sleeves; the longer version carries an additional sheer-looking area down towards the floor. Choose the arrangement you actually want to wear before comparing reflections alone. Try the relevant real shape with your shoes in a neutral stance. Walk, sit and inspect it again afterwards. A striking surface picture cannot answer the length and movement questions for you, and its colour effect may be worth seeking in another cut.
The water photograph records a deliberately staged moment. Use it for the visible small reflection pattern without treating water as part of the intended use. Ordinary movements in a suitable dry setting are enough for your fitting. With a long outer area, check how you want to handle it while walking and seated; with short trousers, consider leg openings and room while sitting. Our high-low party dress guide adds length questions, while the tiered party dress guide helps compare several visible surfaces. Transfer the relevant task to your actual pieces.
4. Treat neckline and belt as separate lines
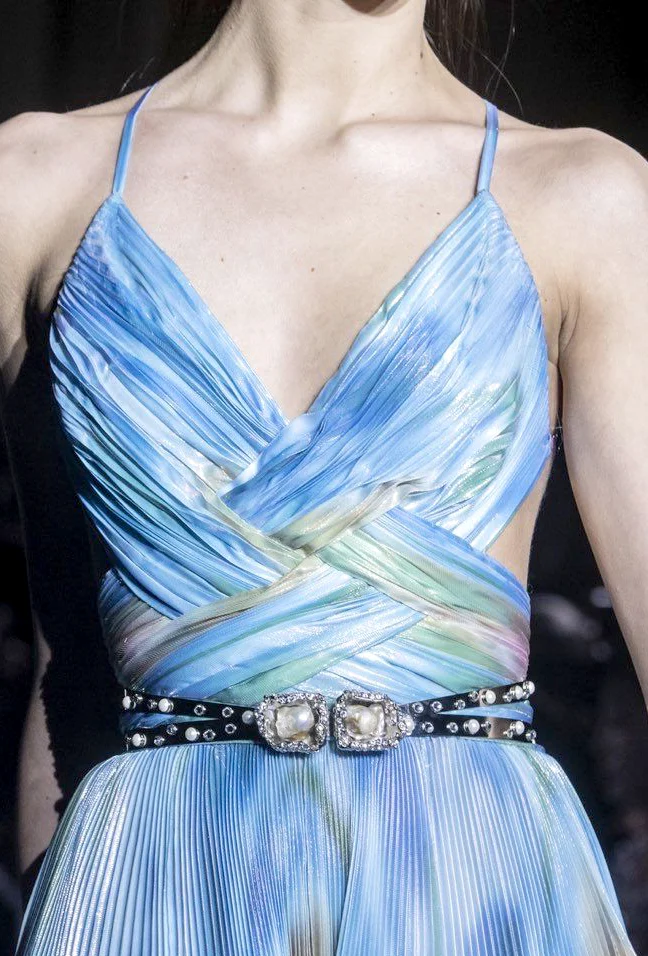
The pale close view shows fine straps and a deep V-neckline. Diagonal folds overlap at the middle, with a dark embellished belt adding another horizontal boundary below. Pale blue, green and slight violet areas create a different distribution from the dense small reflection pattern. Examine those lines without an additional necklace first. Introduce your intended neck jewellery afterwards, checking whether it occupies the open space or overlaps the angled areas. You can enjoy the colour play while seeking another neckline, keeping those two preferences separate when requesting actual options.
For your own combination, compare the waist with and without a dark finish where the actual garment allows it. The photograph has a prominently decorated solution rather than a requirement for every version. Notice how much attention the buckles receive beside the already active folds. If the real dress has a fixed belt, ask which arrangement is supplied before planning an alternative. A covered transition or conspicuous buckle does not establish which pieces are removable and which belong to the construction of the particular garment you are considering.
5. Keep a blue-green detail separate from the complete view
The closer blue-green crop shows strong reflections across torso and waist, with a long black ribbon at the side. It is a useful colour reference but reveals neither the whole neckline nor the hem. Request complete views for a similar offer. Then decide whether your holographic-look outfit needs only a small zone or a larger area. An attractive detail can clarify your preference without fixing the final garment shape. Record colour and desired full view as separate points so the appeal of a close photograph does not silently answer missing length or neckline questions.
6. Check actual colour play and care on the garment
Have actual candidates shown beside one another in the same lighting where possible. Inspect from the front and slightly to the side, then repeat after a few steps. This assesses the surface you can actually see rather than deriving a promised colour change at every angle from one image. Note the colours visible on the offered piece and the amount of quiet background beside them. The term holographic-look outfit describes the appearance here; a particular fibre, coating or optical technique requires concrete product information rather than interpretation of the photograph alone.
Discuss care and possible changes for the complete arrangement, including trim, ribbon and outer layers. The GINETEX care-symbol explanation helps interpret the actual label. Shine and photographed water do not prescribe a treatment. Finally choose the shape whose colour distribution appeals as a whole and which you have tried with your real additions. One clearly selected active surface can lead an evening outfit; further accents should perform a role that you have actually chosen to see in a direct comparison.
A holographic-look outfit can use broad colour areas or many small reflections; compare the scale and placement before choosing the silhouette.
Frequently asked questions
Does every part of an iridescent-looking outfit need equal emphasis?
No. A reflective top with a quieter lower section creates a different focus from an almost entirely reflective surface.
Do the photographs establish genuine holographic technology?
No. The appearance identifies neither coating, fibre nor an optical manufacturing process; technical claims need information for the actual product.
What does the picture in water contribute to the comparison?
It shows a short trouser look with many coloured reflections. It does not establish suitability for water or a particular care method.